Using Evoke

They simply select components, widgets, adaptations, fonts, colors, etc from comprehensive libraries within Evoke to create menus and screens, use and manage data in your data base files, interact with other systems, etc. and then Evoke generates these into the deployable app in a fraction of the time of traditional methods. Evoke allows you to easily create web and native apps and fully integrate and synchronise with existing back-end systems and databases.
The Evoke Designer includes a comprehensive, interactive, user guide that is part of the product and in a "how to" video series, again linked from the product. There are also free app design reviews, training and other support for all users. Evoke allows you to create App designs; these are then generated, using Evoke, into Web or Native App solutions in Visual Studio which can be deployed as your working apps.
Here we review some of the basics of using Evoke and provides examples of some of the functionality available. To understand more about Evoke please contact us for a full demonstration of the product.
Getting Started
Simply download Evoke and log in using your account details provided by BlueFinity. Once in Evoke (see screenshot above right) you can choose to either start a new app design or continue with an existing App design. Evoke saves your app designs to a secure account area on Microsoft Azure and then uses this design to generate the code for your runable app. All of the source code for your runable app is stored on your local computer.
Evoke guides you through the areas you need to complete to create a sophisticated full function app.

Overall Look and Feel
First, you need to decide upon and set up the look and feel of your App i.e. the colour scheme you will use, the style and location of the menu, images in the menu area, fonts you will use, font sizes, if you want to use app watermarks or background images, will you use the cultural styles of different mobile devices or your own cultural style, what login screen and user-authenticaion method will you use, what happens when a user logs in, how will you authenticate them, do you want set up team working on the same app design, etc.
Once set up, all of these settings can be saved as the "Theme" for your App that can be used over and over again in your different app designs or changed as you require. You will also find a full range of existing pre-set app design Themes in Evoke that you can use to get started or to modify and use.
Working with and Managing your data

Now you have connected to your physical databases, you need to define, for the App User Interface (UI), the data structures (shape of the data) that the UI will use. These are called Entities in Evoke and they define the structure of the data that is part of the tables/files in your physical (backend) database that will be used by the App.
As such an Entity may define a record with several fields/properties that are spread out throughout a record with many dozens of properties/fields in the physical database.
In addition you can set up data structures that are local to your app and are not stored in your databases, create calculated properties, classifications (static and dynamic drop-down lists) and Selections that will populate data from your database into your app UI to be displayed, updated, deleted, added to and manipulated in other ways before being updated in your database repository. Entity structures can be automatically imported and exported to and from your database. You can also use all the linking structures that you use in your existing database e.g SQL (joins, link tables, etc) and MultiValue (local or remote keys, embedded multivalues and subvalues, etc) as part of your Evoke data structures.
In addition you can set up data structures that are local to your app and are not stored in your databases, create calculated properties, classifications (static and dynamic drop-down lists) and Selections that will populate data from your database into your app UI to be displayed, updated, deleted, added to and manipulated in other ways before being updated in your database repository. Entity structures can be automatically imported and exported to and from your database. You can also use all the linking structures that you use in your existing database e.g SQL (joins, link tables, etc) and MultiValue (local or remote keys, embedded multivalues and subvalues, etc) as part of your Evoke data structures.
Finally, you have to have areas where selected data from your backend physical database can be read into the App and manipulated i.e. updated, new records created, deleted, etc. before being written back.

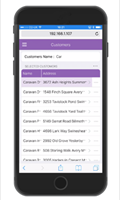
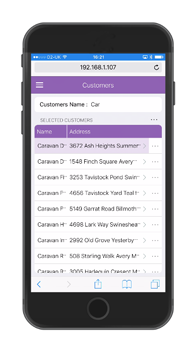
The User Interface of your App can be designed and customised down to the smallest detail within your Evoke App Design. The menu in your App can have multiple different looks and designs and is set up in the Menu area within Evoke. Once you have a menu for your App, each menu item is linked to a different logical/functional area of your App in Evoke that contain the UI screens of the app (called a Page Series).
Each Page Series in Evoke contains an entry screen and any other screens used in that area of the App. Pages (your app screens) are where you design, configure and create each screen (the UI) that will be part of your App.
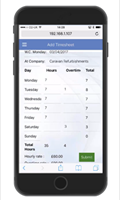
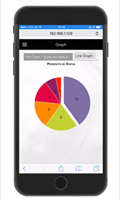
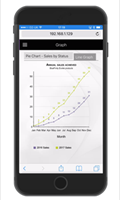
Each Page is made up of Segments and these can be any size and can have any number of Child segments within them. Each Segment can contain data elements, text, images, datagrids, buttons, graphs, signature panels, chatbots, entry boxes, etc - in fact over 100 different automatic Evoke UI widgets.
You can create the specific "look and feel" of a Page that you want with any layout, format, colors, fonts etc that you choose. Evoke's WYSIWYG design interface makes it easy to structure your Pages, create adaptations, add navigation, run Click Actions, display and manipulate data and there are many 'wizards' that make this even quicker and easier.

You can create a no-code (just drag & drop/point and click/option select) full function app in hours or days using Evoke's:
-
Comprehensive Component Library of actions (Click Actions)
-
Over 100 different UI widgets (Widget Library)
-
Standalone components including Web services, Google Maps, 360° images and hotspotting, embedded videos, Chatbots, etc. (Components)
-
Easy to configure Selections, Adaptations, Navigation, colors, styles, fonts, etc
-
Code hooks to easily add third party component libaries, your own code, custom code, etc
-
Language support that lets different users see your app in different langauges
-
Users can search, sort, filter and amend column sizes on tables and data grids in the app UI
-
Select data from multiple database tables and retrieve related data using Selections configured easily via wizards
Then with one click of the Evoke Generate button, let Evoke turn your app design into a deployable app that your users can log into.

When you have created your App design, Evoke will automatically Generate either a Web App or a Native app for you. Hybrid apps are supported through the BlueFinity App Runner container process. This process will validate your App design providing details of both warnings and errors that may need to be corrected and allow you to specific a location on your local computer that you would like all of the source code for your app placed.
Your Visual Studio Solution
Once you have used Evoke to your App design into and App it will have created a full and complete Visual Studio solution that is now on your local computer. You now have choices 1. to simply build/run the App from Visual Studio to test it or 2. If you are familiar with Visual Studio you may wish to to add some bespoke custom code or integrate some of the multitude of library components that are available to you. If you choose the second option then the Evoke Code Buddy can help you.
Your App
That's it! You have a web app running. If you generated a native app then there are a couple of extra steps detailed in the Evoke Native app generation section but fundamentally you have your app and can deploy it for others to use.
What Else
Now you come to the deployment and use of your App. For web apps it is as simple as deploying the Repository Access and Web folders created by Evoke to your Web Server and for native apps you will need to deploy the App executable to the appropriate app store. For Web Apps we always recommend the App is accessed via https.
You can go back into your App design and adjust things such as setting different users into different security or user groups to give users a unique navigation route through your app, add menu icons, change colours, use additional Evoke component actions from the Evoke libraries etc. or you can add other custom code to your Visual Studio solution. In all cases when you regenerate your App from your updated design your custom work, created as part of your App outside of Evoke, is preserved and not overwritten.
Now that you know a little about using Evoke, please contact us to ask for a live demonstration of the product or to check out some of our demonstration apps that have been created.
 How Evoke Works