
Deployment of Web Apps - IIS
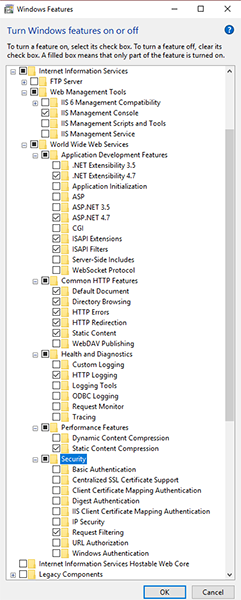
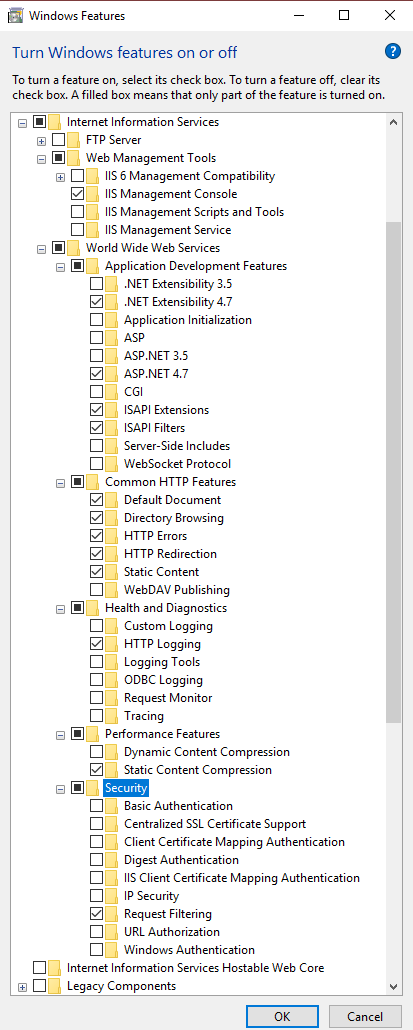
Your web server computer will need to have Internet Information Services (IIS, formerly Internet Information Server) installed.
This is an extensible web server created by Microsoft and is pre-installed and bundled with all Microsoft operating system products so it will almost certainly be present, however, it is possible you might need to 'turn it on'. If you need to turn it on the process is
This is an extensible web server created by Microsoft and is pre-installed and bundled with all Microsoft operating system products so it will almost certainly be present, however, it is possible you might need to 'turn it on'. If you need to turn it on the process is
-
access the windows "control panel"
-
access "programs and features" section
-
click on "turn windows features on or off"
-
scroll down to 'Internet Information Serices' and check the boxes for 'web management tools' and 'world wide web services'
-
check (turn on) the options as shown in the screen on the right (click on the image to see a larger version)
Configure IIS
First open IIS manager. To open IIS Manager from the Start menu, click Programs or All Programs, and point to Administrative Tools.
IIS 6.0: Click Internet Information Services (IIS) Manager.
IIS 5.1, IIS 5.0: Click Internet Information Services.
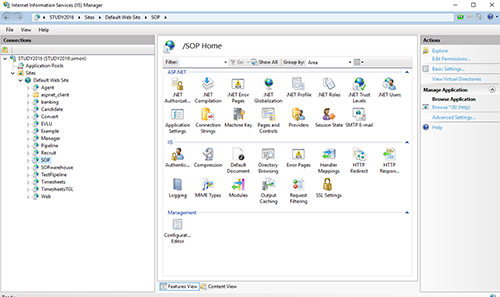
You will now see a screen similar to the screen on the left.
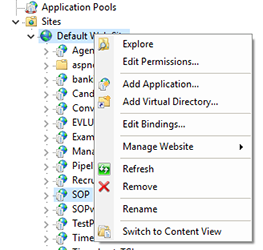 Right click Default Web Sites and it will bring up the menu, as shown on the right.
Select the Add Application option
A new window will open, as shown below left.
In the Alias box add the name you set up within Visual Studio Project URL (i.e. when you right click the web folder in Visual Studio and select Properties, in the Web section you added a name in the "Project URL" area).
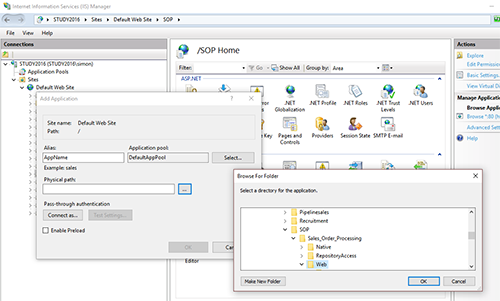
In the Physical Path box click the "..." and browse to the location of the web folder for your app that Evoke created.
Double click this folder and the path will be copied into the Physical Path box.
Click ok.
IIS 6.0: Click Internet Information Services (IIS) Manager.
IIS 5.1, IIS 5.0: Click Internet Information Services.
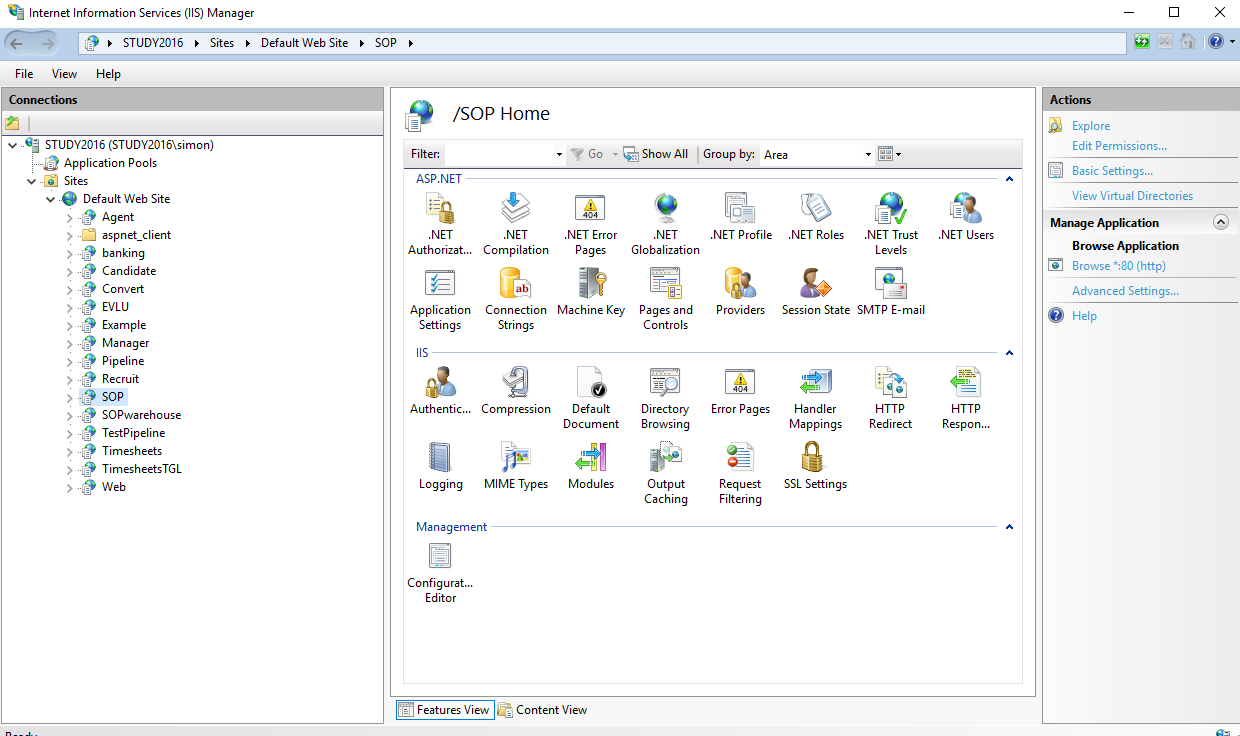
You will now see a screen similar to the screen on the left.
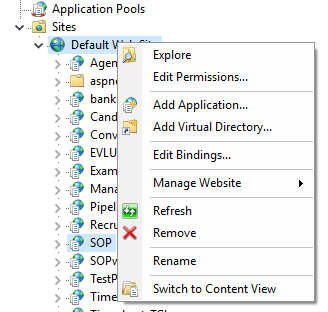
Select the Add Application option
A new window will open, as shown below left.
In the Alias box add the name you set up within Visual Studio Project URL (i.e. when you right click the web folder in Visual Studio and select Properties, in the Web section you added a name in the "Project URL" area).
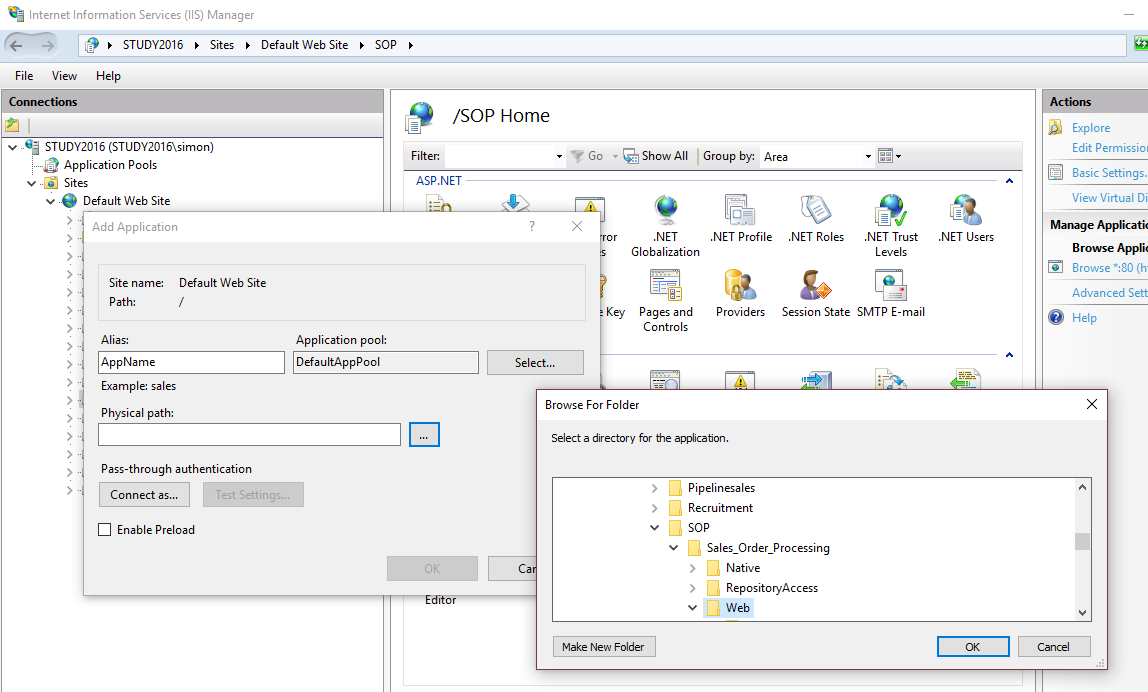
In the Physical Path box click the "..." and browse to the location of the web folder for your app that Evoke created.
Double click this folder and the path will be copied into the Physical Path box.
Click ok.
Set Permissions
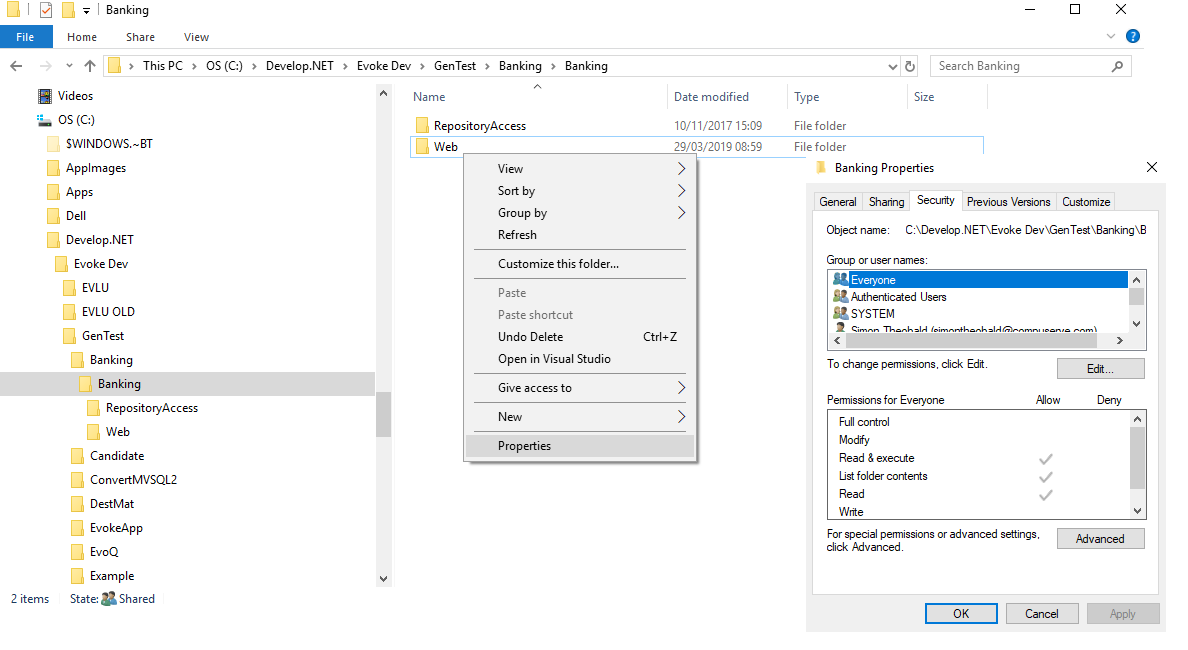
Right click the web folder and select Properties, this will open up the Properties box as shown in the image on the right.
Click the edit button, and then the add button, and then the advanced button, and finally the find now button.
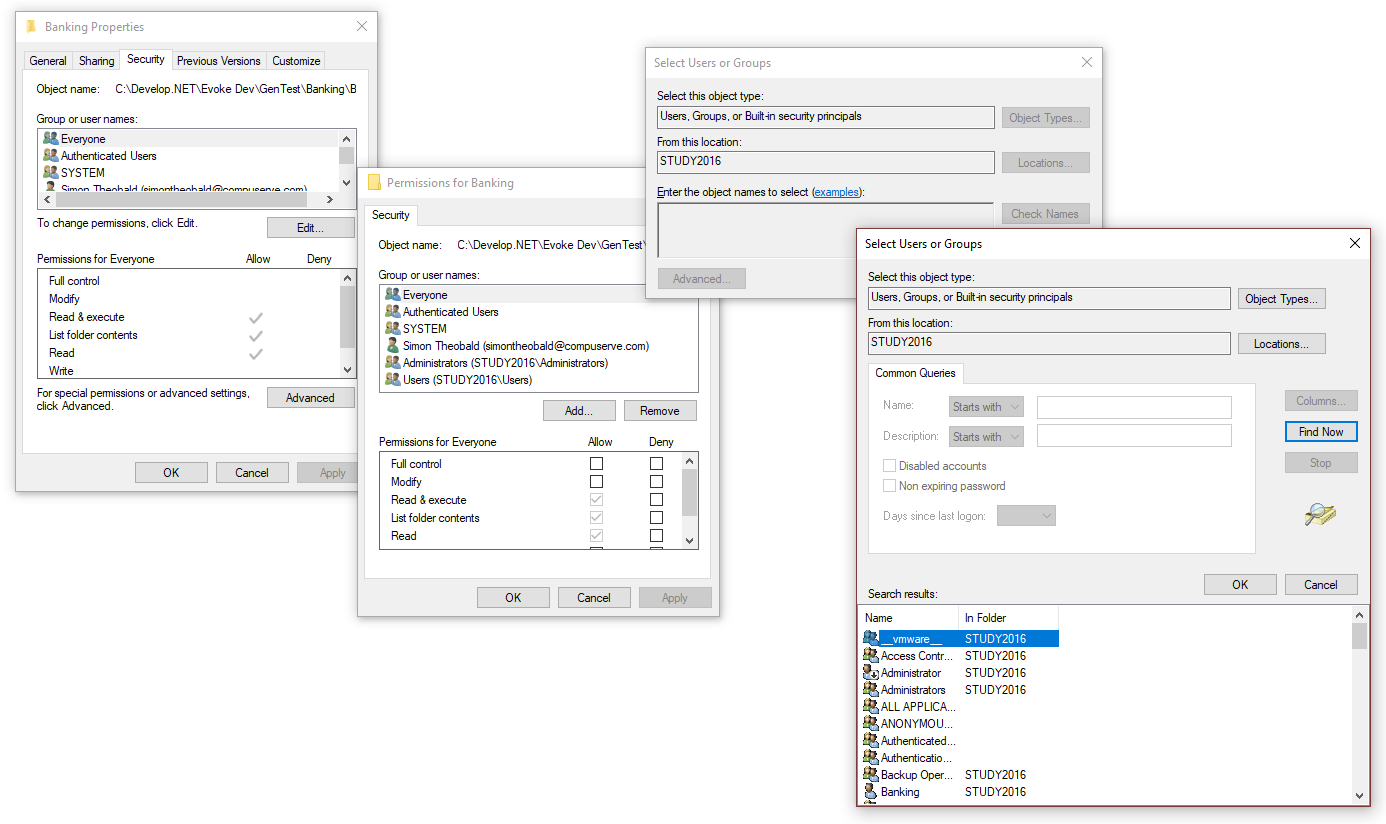
Screen pops as shown on the left will have come up.
In the list that has been populated on the final screen, scroll down and find everyone and double click on it.
Now back on the permissions screen (two back) select everyone, tick Full Control and click the apply button.
Firewalls and Virus Checkers
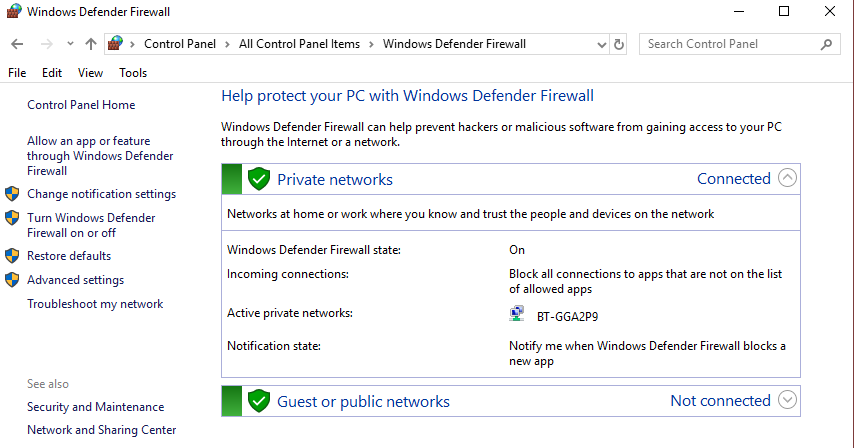
It is possible you may have to "allow an app or feature through Windows Defendor Firewall" (see menu option on left of screenshot)
or configure your virus checker to not block access to your app.