
Defining and Connecting to a new Database (Data Repository) in an Evoke App Design

This section summaries the requirements and some of the options to set up an Evoke App Design with your different databases (that have not been defined previously in your Evoke app design).
Explanation of setting up a new Data Repository with your Evoke App design
When you what to connect a database to your app design you need to:

Identify the different databases, define where they are and the connectivity method and any login information required to establish a connection. This is done in the Repositories section of Evoke.
There are additional configuration considerations that are specific to each database type. These are details below on this page and it is import to complete these AFTER you have followed the steps below.
There are additional configuration considerations that are specific to each database type. These are details below on this page and it is import to complete these AFTER you have followed the steps below.
Define data mappings
For each database/data repository you need to provide mapping information that defines which Evoke Entities are associated with which tables/objects/files and which database fields/properties map on to which Evoke Entity Properties within your app design data model. This is done in the Data Mappings section of Evoke.
Select which databases and which mappings to use in your app design and generation
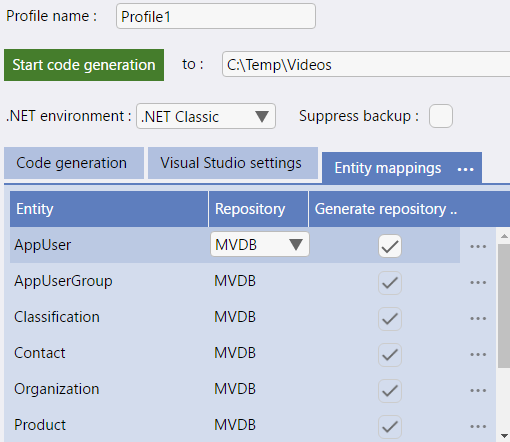
When you generate an app (a Visual Studio solution) from your app design you need to tell Evoke which tables/objects are in which databases. This is done in the Entity Mappings section of Evoke. It is very likely that initially all of your entities will be hosted in the same, single repository. However, it is possible to access multiple repositories within a single app if required.
Set up the mandatory Entities
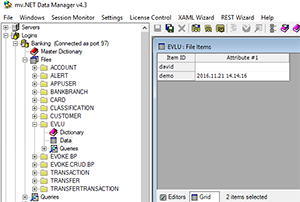
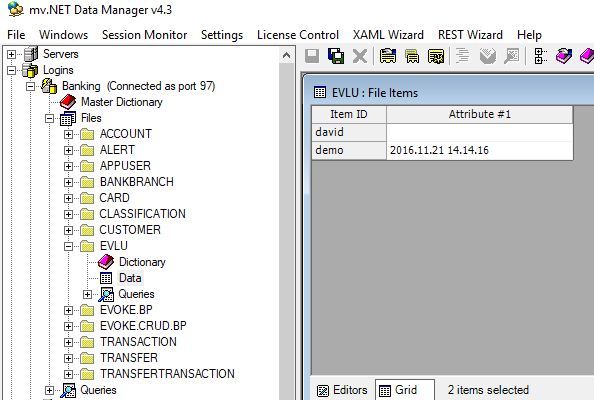
Evoke Apps require certain Entities as mandatory for an app to be generated and run. These files/tables can be created automatically be Evoke. There are many options for these mandatory entities in order for you to be able to set up your App exactly as you want. The AppUser, AppUserGroup and Classification Entities are mandatory and cannot be deleted from an Apps Entity model. The licensing terms of Evoke require that you create a very small table/file within your database called "EVLU". This file/table is used by Evoke licensing and users of your app will not be able to log into your app if it does not exist or correct entries in the table/file do not exist. You do not need to include it in your app Entities or complete the data mappings for this table/file BUT the table/file must exist in your database. An explanation of how to set these up may be found in the Reserved Entities section of Evoke.
Ensure mandatory Selections are in place and start selecting data
Within Evoke you will use Selections to select certain data from your Repository (database) to populate a DataSource. With Evoke Selections you are able to select data from your table/object just as you would if interacting directly with your database as you do currently.
Evoke requires you to have one mandatory Selection against the AppUser Entity. This serves as both an example and the default login selection. The default Evoke App design includes this selection and an explanation of how to set this up for new databases may be found in the Mandatory Selection section.
Evoke requires you to have one mandatory Selection against the AppUser Entity. This serves as both an example and the default login selection. The default Evoke App design includes this selection and an explanation of how to set this up for new databases may be found in the Mandatory Selection section.
The following database/data repository technologies are fully supported by Evoke and each bullet point below links to specific instructions for that database type:
-
a Custom Data Environment
SQL database
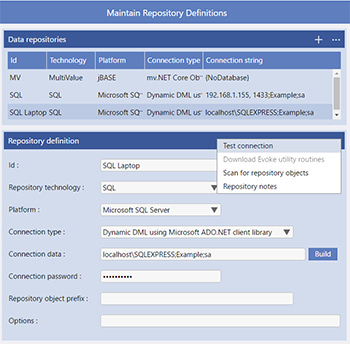

To set up a new SQL database as part of your Evoke App design. First go to to the Repositories and set up the Data Repository profile.
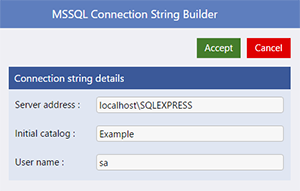
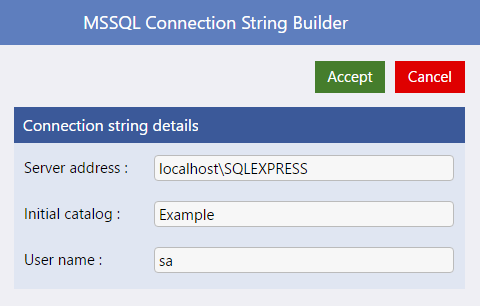
Select the connection type (usually the ADO.NET client library that is installed as part of a SQL database) and then use the Build Button to help set up the connection data and then use the "Test Connection" option to check if you can access and logon to your SQL database.
 Use the "Scan for repository object" option in the ellipsis on the lower segment to populate a list of tables in your database. You can now "import" these into your Entities if you wish.
Make sure you have your AppUser, AppUserGroup and Classification and EVLU tables in your database and set up as described in the Reserved Entities section.
Next, go into the Data Mappings section of Evoke and ensure your table columns are mapped against the appropriate Entity property.
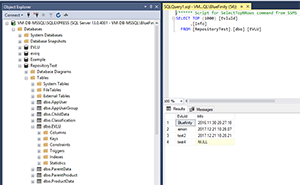
You will need to populate your EVLU and AppUser Tables with the information needed for the first/test user to log in.
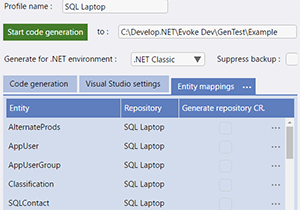
Go to the Entity Mappings section and select the name that you gave to the database/repository profile against each of the Entities listed.
 You can now generate your app with the new database.
The things that normally catch people out during this process are that the EVLU and AppUser tables are not populated with data or that the connection string/data is not correct. We recommend asking your DBA to help with this part but if you can get the "Test Connection" to show that Evoke has connected to the database you should be ok.
Select the connection type (usually the ADO.NET client library that is installed as part of a SQL database) and then use the Build Button to help set up the connection data and then use the "Test Connection" option to check if you can access and logon to your SQL database.
Make sure you have your AppUser, AppUserGroup and Classification and EVLU tables in your database and set up as described in the Reserved Entities section.
Next, go into the Data Mappings section of Evoke and ensure your table columns are mapped against the appropriate Entity property.
You will need to populate your EVLU and AppUser Tables with the information needed for the first/test user to log in.

Go to the Entity Mappings section and select the name that you gave to the database/repository profile against each of the Entities listed.

The things that normally catch people out during this process are that the EVLU and AppUser tables are not populated with data or that the connection string/data is not correct. We recommend asking your DBA to help with this part but if you can get the "Test Connection" to show that Evoke has connected to the database you should be ok.
MultiValue database
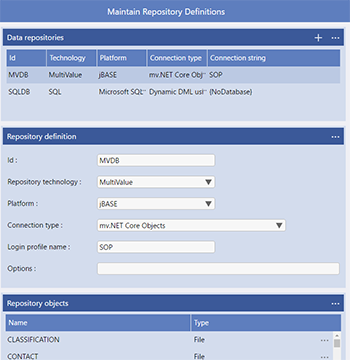
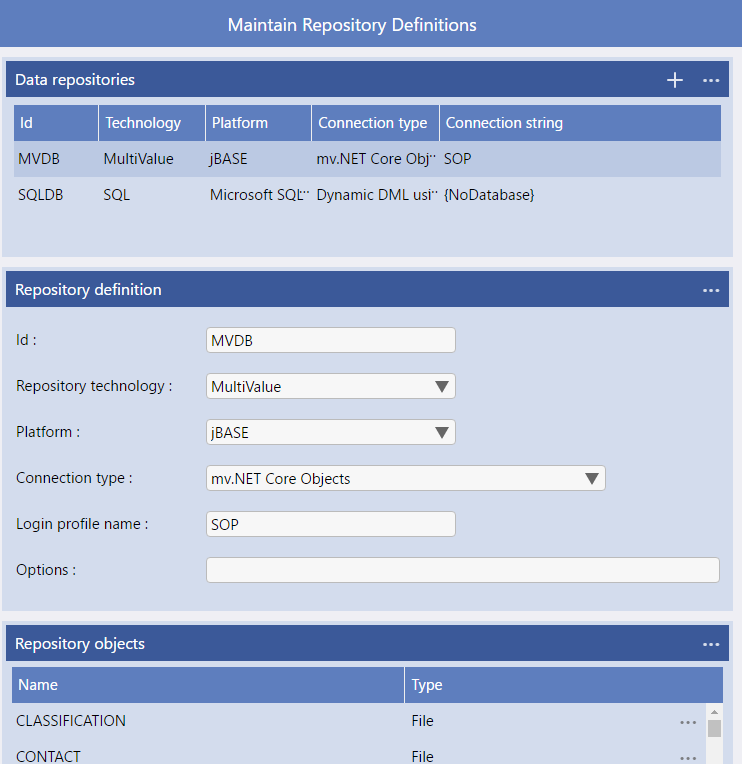
To set up a new MultiValue database as part of your Evoke App design. First go to to the Repositories and set up the Data Repository profile.
The Login Profile name is the key piece of information here (check with a DBA for help with this - it can be found in mv.NET) and then use the "Test Connection" option to check if you can access and logon to your MultiValue database.
 Use the "Scan for repository object" option in the ellipsis on the lower segment to populate a list of tables in your database. You can now "import" these into your Entities if you wish.
Make sure you have your AppUser, AppUserGroup and Classification and EVLU objects in your database and set up as described in the Reserved Entities section.
One of the main purposes of the generated .NET code is to invoke the relevant DataBASIC subroutines residing on your MultiValue database server. The specific server-side routine that is called and the data that is passed to it depends entirely upon the type of repository related action that has occurred within the App UI. Evoke can create the initial content of these server-side routines (known as CRUD routines - Create, Read, Update and Delete) and you are then able to add your own code as necessary in order to implement the required database file access logic.
At this point it is necessary to create this initial code and full instructions are available in the CRUD creation for multivalue databases user guide/help pages. Please review these instructions and follow them before continuing.
Next, go into the Data Mappings section of Evoke and ensure your object attributes are mapped against the appropriate Entity property.
You will need to populate your EVLU and AppUser Tables with the information needed for the first/test user to log in.

Go to the Entity Mappings section and select the name that you gave to the database/repository profile against each of the Entities listed.
You can now generate your app with the new database.
The things that normally catch people out during this process are that the EVLU and AppUser tables are not populated with data or that the login Profile Name is not correct. Also generating, compiling and cataloging the new CRUD code is vitally important and your app will not function if this step has not been completed. We recommend asking your DBA to help with this area if you are in any way unsure of these steps.
The Login Profile name is the key piece of information here (check with a DBA for help with this - it can be found in mv.NET) and then use the "Test Connection" option to check if you can access and logon to your MultiValue database.
Make sure you have your AppUser, AppUserGroup and Classification and EVLU objects in your database and set up as described in the Reserved Entities section.
One of the main purposes of the generated .NET code is to invoke the relevant DataBASIC subroutines residing on your MultiValue database server. The specific server-side routine that is called and the data that is passed to it depends entirely upon the type of repository related action that has occurred within the App UI. Evoke can create the initial content of these server-side routines (known as CRUD routines - Create, Read, Update and Delete) and you are then able to add your own code as necessary in order to implement the required database file access logic.
At this point it is necessary to create this initial code and full instructions are available in the CRUD creation for multivalue databases user guide/help pages. Please review these instructions and follow them before continuing.
Next, go into the Data Mappings section of Evoke and ensure your object attributes are mapped against the appropriate Entity property.
You will need to populate your EVLU and AppUser Tables with the information needed for the first/test user to log in.
Go to the Entity Mappings section and select the name that you gave to the database/repository profile against each of the Entities listed.
You can now generate your app with the new database.
The things that normally catch people out during this process are that the EVLU and AppUser tables are not populated with data or that the login Profile Name is not correct. Also generating, compiling and cataloging the new CRUD code is vitally important and your app will not function if this step has not been completed. We recommend asking your DBA to help with this area if you are in any way unsure of these steps.
Generating an App Design with no backend Database
If you wish to view the UI of your running app without having a backend repository in place, you are able to supply a special connection string ("{NoDatabase}") within your repository definition that indicates to Evoke that no repository connection is to be established when the app runs. This can be useful in the initial phases of app development. Obviously, if you use the {NoDatabase} connection string no repository data will be available to your app, plus, the login page will accept any login name and password.
Note, even if you do use the {NoDatabase} connection string, you will still need to enter data mapping details. If you don't know the mapping details yet, simply enter dummy ones for the time being.
Mandatory Entities and Selections.
Mapping to MultiValue Databases.
Mapping to SQL Databases.
Classifications.