Evoke is a powerful, yet easy to use, system that will allow you and your existing staff to create sophisticated business apps in a fraction of the time. The
basics of using Evoke to create powerful business apps should be reviewed and then this user guide will help you discover, understand and navigate through building your own app designs with Evoke and generating these into web, hybrid and native apps that can be deployed to your users.
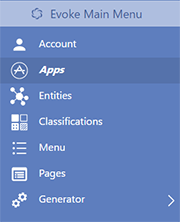
After downloading Evoke and logging in with your Evoke user account details, the system is easy to navigate using the navigation menu on the left of the screen, leaving the main part of the screen as your Evoke workspace.
First, You will need to
select the app design, stored securely in your personal Evoke account, that you want to work on or choose to create a
new app, which will setup a new blank app design with default Pages and menu items for you to change. You will notice that we have included some of our
demonstration app designs, including our popular '
Example App', in your account for you to review and, if desired, copy the way we have used Evoke functions or implemented different features. Our demonstration app designs may also be used as seed apps (a starting point) if you wish to create a similar app. Please ask BlueFinity about our other seed apps that we are happy to give to you.
We use various terms, consistent with App development, within Evoke and you will find our
Glossary helpful to ensure a consistent understanding of these terms. The
Frequently Asked Questions section also helps with answers to the questions asked previously by other Evoke users.
Account
The
Account area in Evoke, allows you to review your Evoke Account information, manage the App Style Themes that are provided as standard within Evoke or that you have saved against your Evoke Account and the User Logins that have been setup to access your Evoke Account.
Apps
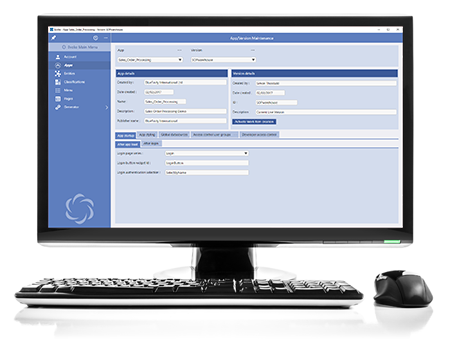
After selecting an app design to work on you are automatically directed to the
Apps area to update the App Settings. This section allows you to set up the location of your login page, how you will validate the user logging in and what to do upon a successful login i.e. display another screen. It will also allow you to set up or use a saved "Theme" for your App (colors, fonts, backgrounds, etc), design your menu layout, identify the different access control user groups that your app will use, specify the developers you approve to work on your app, set up team working on the same app design, etc.
Entities
The
Entities section in Evoke allows you to define and set up the data structure that you will use in the User Interface (UI) in your App. This is often a subset of the data structures in the databases that you use in your backend products/database. In addition you can set up data structures that are local to your app and are not stored in your databases, create
calculated properties, classifications (static and dynamic drop-down lists) and
Selections that will populate data from your database into your app UI to be displayed, updated, deleted, added to and manipulated in other ways before being updated in your database repository. Entity structures can be automatically
imported and
exported to and from your database.
Repositories
The
Repositories section of Evoke (in the Generator Menu) allows you to define and connect to the actual, physical, back end databases that will be accessed and used by the App. You can set up connections to and access as many different databases, in your single app design, as you like. This is where you define the connection method to your database, the type of database that it is, it's location, etc. and Evoke connection builders will automatically guide you through the process. You are able to 'scan' your database to read the table/objects available and include connection to them within your app design so that you can access them via your app 'Entities'.
Data Mappings
The
Data Mappings area within Evoke (in the Generator Menu) allows you to define how you want to match each field/column/property in your database with the corresponding property in your app design 'Entity'. If you use Evoke to import your Entity structures then this is completed automatically. You can also use all the linking structures that you use in your existing database e.g SQL (joins, link tables, etc), MultiValue (local or remote keys, embedded multivalues and subvalues, etc). In addition, you can further refine your
Selections, set up against each table/object via 'Entities', with database specific select, sort, filter, etc attributes to select and manage your data exactly how you want to or to incorporate existing unique custom routines that you have previously written.
Menu
The
Menu area within your Evoke app design is where you manage the menu that will be in your app. This is where you can add menu items, with different captions, to your menu structure that you originally designed in the
Apps area. You can include images for different menu items, create sub-menus and a full menu hierarchy, create different security levels so different users see different menu items, change the order of your menus and link each menu item to a "Page Series" (functional area of your app).
Page Series
A
Page Series in Evoke is a discrete functional area of your app. Each Page Series must have at least one and up to as many Pages (different app Screens) as you wish and each menu item is linked to a Page Series. In the Page Series area you can add, delete and modify Pages, link any Pages used in different Page Series, copy Pages and set various Evoke
Click Actions (Evoke's comprehensive and powerful actions library) and Selections to automatically run when a Page Series is accessed from a menu item being clicked. You can also define a many local DataSources (data areas), for use within each individual Page Series, as you need.
Data Sources
Data Sources, set up and defined in the
Page Series area, are Page Series wide, local, data areas that are used by the App Pages and Click Actions in your App. Data is populated, via a Selection, from your database (repository) into a Data Source and can then be displayed, read, changed/manipulated, deleted, new records created, etc. prior to your app writing it back to the physical database when the Data Source is saved. You can also set up selected datasources to have specific filter criteria and to automatcially offer your app users the ability to
Search, Sort and Filter any displayed datagrids in your app.
Pages
Pages (your app screens) are where you design, configure and create each screen (the UI) that will be part of your App. Each Page is made up of Segments and these can be any size and can have any number of Child segments within them. Each Segment can contain data elements, text, images, datagrids, buttons, graphs, signature panels, chatbots, entry boxes, etc - in fact over 100 different automatic Evoke UI widgets. You can create the specific "look and feel" of a Page that you want with any layout, format, colors, fonts etc that you choose. Evoke's WYSIWYG design interface makes it easy to structure your Pages, create
adaptations, add navigation, run Click Actions, display and manipulate data and there are many 'wizards' that make this even easier. This user guide also contains useful examples of using Widgets to
build a page.
In the Generator Menu you can use the App design that you have created to Generate a
Web App or a
Native App. The result of an Evoke generation is a complete Visual Studio and/or VS-Xamarin solution with all the respective projects and final app source code delivered directly to your local computer. This allows you to either add some specific unique customisation if you wish OR simply build and
deploy your app.
In the Evoke Generator area you are able to define where, on your local computer, you would like the final generated app code to be stored, redefine any specific Visual Studio settings, identify which files/tables are in which database(s) for this app, etc and a full App design validation subsystem will alert you to any issues, warnings, errors in your deisgn and how to correct these.


