Panoramic (360 degree images, virtual tours and hotspots)
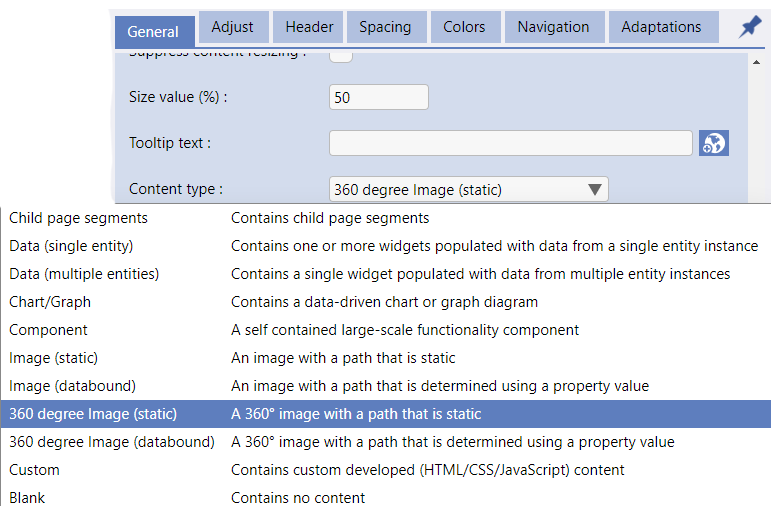
Evoke provides two content types to support Panoramic/360 degree images, virtual tours and hotspotting, these are 360 degree image with a static path and 360 degree image with a databound path.
These content types allow you to include in your app:
-
A virtual tour around a venue or retail store
-
360 degree/panoramic images with auto rotation if required
-
Hotspots on the images that can run Evoke click actions, navigate to URLs, etc.
-
Compass navigation, full screen and back navigation options
There are two types of photos (images) that are refered to as 360°. These are 360°
Panoramic images and
full 360° images. There are a number of implications and considerations for using either of these images in your Evoke app design. Please review the
Panoramic and 360° images explained section for clarifications of these considerations.
Images may be static images, identified in the app design and included in the app, or databound with the image being uploaded within the running app or identifed via the database.
Panoramic or 360° images
After selecting a
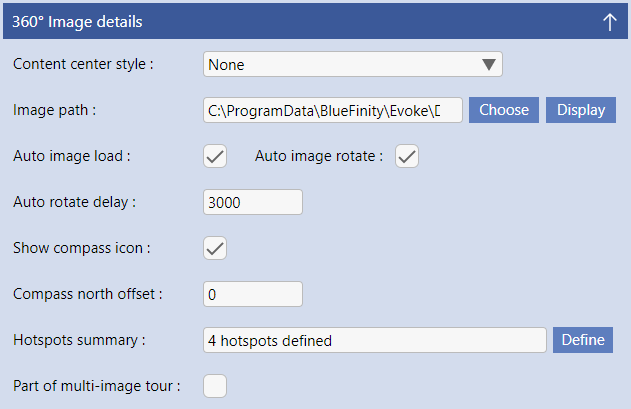
Content Type of 360 degree image a new "360° Image Details" segment/configuration panel will be displayed (see image below left).
In this new configuration panel you can define, for static images, the:
-
Content center style - select if the image should be centered vertically, horizontally, both or no centering style.
-
Image path - select the image to display (for static images this is simply choosing the image located on your computers to include in the app).
For databound images this panel is used to also configure: The Server Folder Path (the folder path (relative to the root 'web' folder) of where the image is stored) and then additional image name variables as required for the display of ordinary databound "images".
You can then go on to configure the following options.
Auto image load - Do you want the image to display immediately or for the user to click to display the image
Auto image rotate - Should the image rotate, continuously, around the panorama/360° ?
Auto rotate delay - If you have selected auto rotate (see above) this is the period of time, in milliseconds, after which, if there is no user interaction, the image should start to rotate.
Show compass icon - Indicates whether a compass will be shown on the image or not
Compass north offset - If you have selected show compass (see above) this is the north offset, in degrees, for the compass
Hotspots summary - A summary of the hotspot definitions set up for this image and a "define" button that allows you to configure hotspots (please see section regarding hotspots below).
Part of a Multi-image tour - Selected to indicate that this image is part of a series of 'hot spot' connected images - known as a tour.
Initial Entry Position - Identifies the hotspot to center on (the view) when the initial image is displayed.
Main entry screen - If you have selected part of a multi image tour (see above), this checkbox allows you to select the first (main entry) image from the series of images.
Show Back Button - Indicate if a tour will have a back button on the screen or if navigation will only be through hotspots.
Member of tour (name) - Give the tour a name and set all images in each tour to be part of that tour.
Hot Spots on the panoramic or 360° image
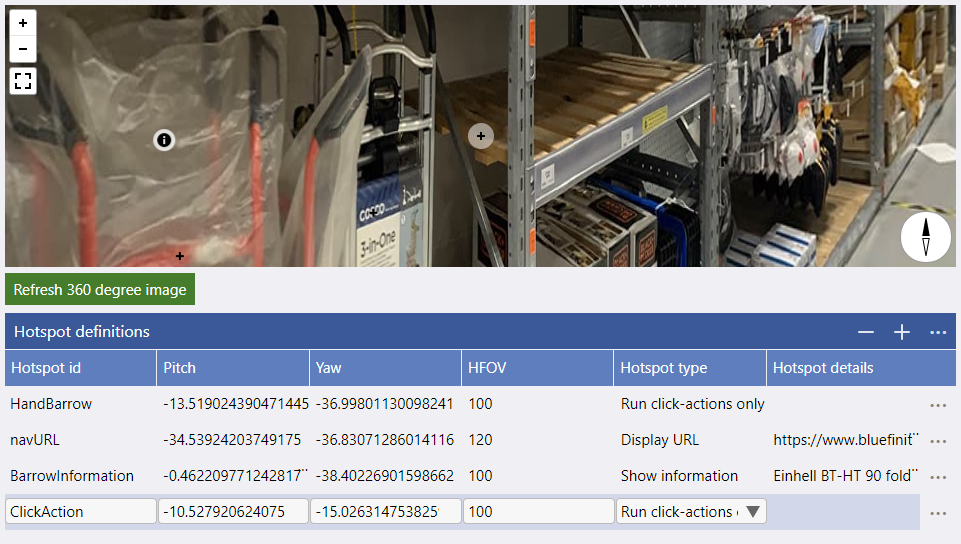
On each panoramic/360° image you can set multiple hot spots. Each hotspot may be one of the following four types:
-
Show Information - display a piece of textual information.
-
Display URL - Display a defined web page in a new browser tab.
-
Display another image - Display another panoramic or 360° image.
-
Run Click Actions only - Only run the click actions associated with this hot spot.
-
Entry Position - Entry point (view) for the image when navigated to from another image hotspot.
What do the settings mean:
-
Hotspot ID - the name that you are giving this hotspot so it can be identified
-
Pitch - to be completed.
-
Yaw - Yaw is the horizontal rotation angle of the camera and part of the Image positioning model. The angle you rotated your camera relative to this image is its Yaw value.
For a typical 360° panorama the yaw difference from one image to the next can be estimated by dividing 360 by the number of images.
-
HFOV - Horizontal Field of View. The central field of vision for most people covers an angle of between 50° and 60°. Within this angle, both eyes observe an object simultaneously. This creates a central field of greater magnitude than that possible by each eye separately. On a 360 degree image Evoke will default his to 100 to cover both eyes. If you include a number higher than 100 then it will "zoom" in on the image.
To add a hotspot simply click the '+' icon and then click on the position on the image when you want the hotspot.
The menu at the end of each hotspot line allows you to:
-
Define Click Actions - define the click actions that are to be associated with clicking this hotspot
-
Go To Hotspot - Move the focus on the image to center on the selected hotspot.
-
Move Hotspot - Move an existing hotspot to a new location on the image
Virtual Tour
A virtual tour is a simulation of a location, i.e. a retail store or business location, composed of a sequence of still images. Evoke vitual tours allow you are able to navigate around the location and receive further information on the things that you see, stop and make purchases or perform other actions, jump out to a seperate website, etc.
Where to get the images
The simple answer is, of course, hire a professional photographer and have them take a series of 360° images. However, for testing purposes there are some simpler and cheaper options.
As can be seen in the section below, you can take either 360° or panoramic images on most phones and use those for testing purposes. BlueFinity also have a small selection of 360° images that we would be happy to let you have if you contact Evoke support. Alternatively, the imternet is full of 360° images that could be used for testing purposes.
Panoramic and 360° images explained
360° Images
360° photos/images are usually taken on a special 360° camera. There are apps available that help you capture a 360° image on a phone/tablet however these often produce imperfect stitching together of individual images and you may see a line and a juxtaposition of images within the overall image.
True 360° images/photos are perfect for use in an Evoke app. You are able to view everything from the ceiling/sky to the floor at your feet and to turn around many times seeing the full view.
The only issue with 360° images/photos is that they are sometimes very large in physical size (i.e. >5MB). As you are likely building an app that will be used on mobile devices that use the intenet (wifi or 4G/5G) then images of this size would take far too long to transfer over the communications environment. It is vital to reduce the size of the photos/images and there are many ways to do this.
We will describe what we do with these images to reduce the size, however, there are many options and these examples may not be the best option for your images. First, we reduce the pixel height and width, while it is good to have the highest resolution possible of an image it is also sensible to have the highest practicle resolution, reducing the image height to around 1048 pixels can reduce the physical size of an image by 90% i.e. 55MB down to 5MB and then passing the resulting image through image compression routines e.g. we use "Sqoosh" which is available free of charge online, can reduce the size by a further 90% e.g. 5MB down to 500kb. This resulting image should be used in your app design.
Panoramic Images
360° Panoramic Images may be taken on a phone or camara with the intention of giving a horizontally elongated field of view that starts at one point and ends at the same point. Please note that, as standard, phones such as the iphone or Samsung galaxy will take a panoranic photo that stops BEFORE it has reached the full 360° and so either a special camera or and app should be used to ensure that the full 360° are captured.
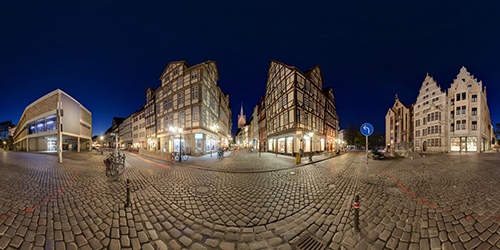
An example panoramic image, that is not a full 360° is shown opposite. The first thing you will notice about the two images (360° and panoramic) is that the "perspectives" are different at the very top and bottom and far left and right of the images. This is because the "field of view" in the Panoramic image is a limited height.
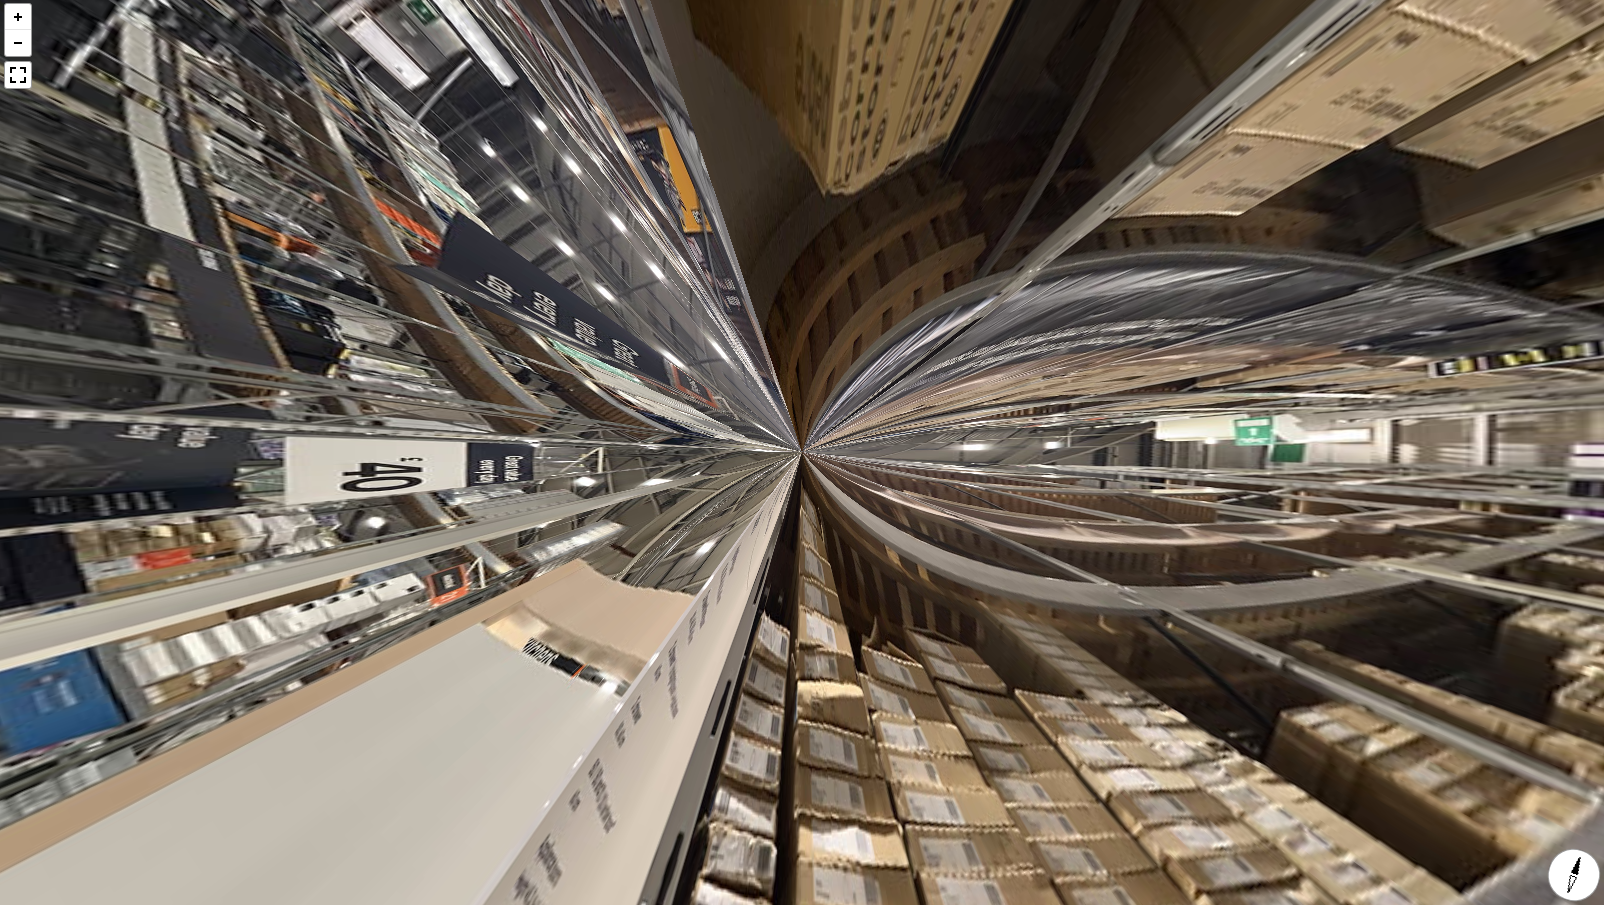
If you use a standard panoramic image in your Evoke app design then it will produce a wonderful 360° view on the center line of the image BUT as soon as try to view up or down the top or bottom of the image will quickly stretch to infinity. Please see the example image on the left.
The reason for this is that the panoramic field of view is only horizontal, unlike the 360° image which is both horizontal and vertical (and also have additional perspective depth). However, there is a very quick and easy work-around if you really want to use a 360° panoramic image. Open your panoramic image in photo editing software and increae the canvas size by 80% of the size of the image making it 180% in height (please note - not the image size just the canvas size). The additional "canvas" should be equally shared over the top and bottom of the image and should be set to a colour e.g. white or black.
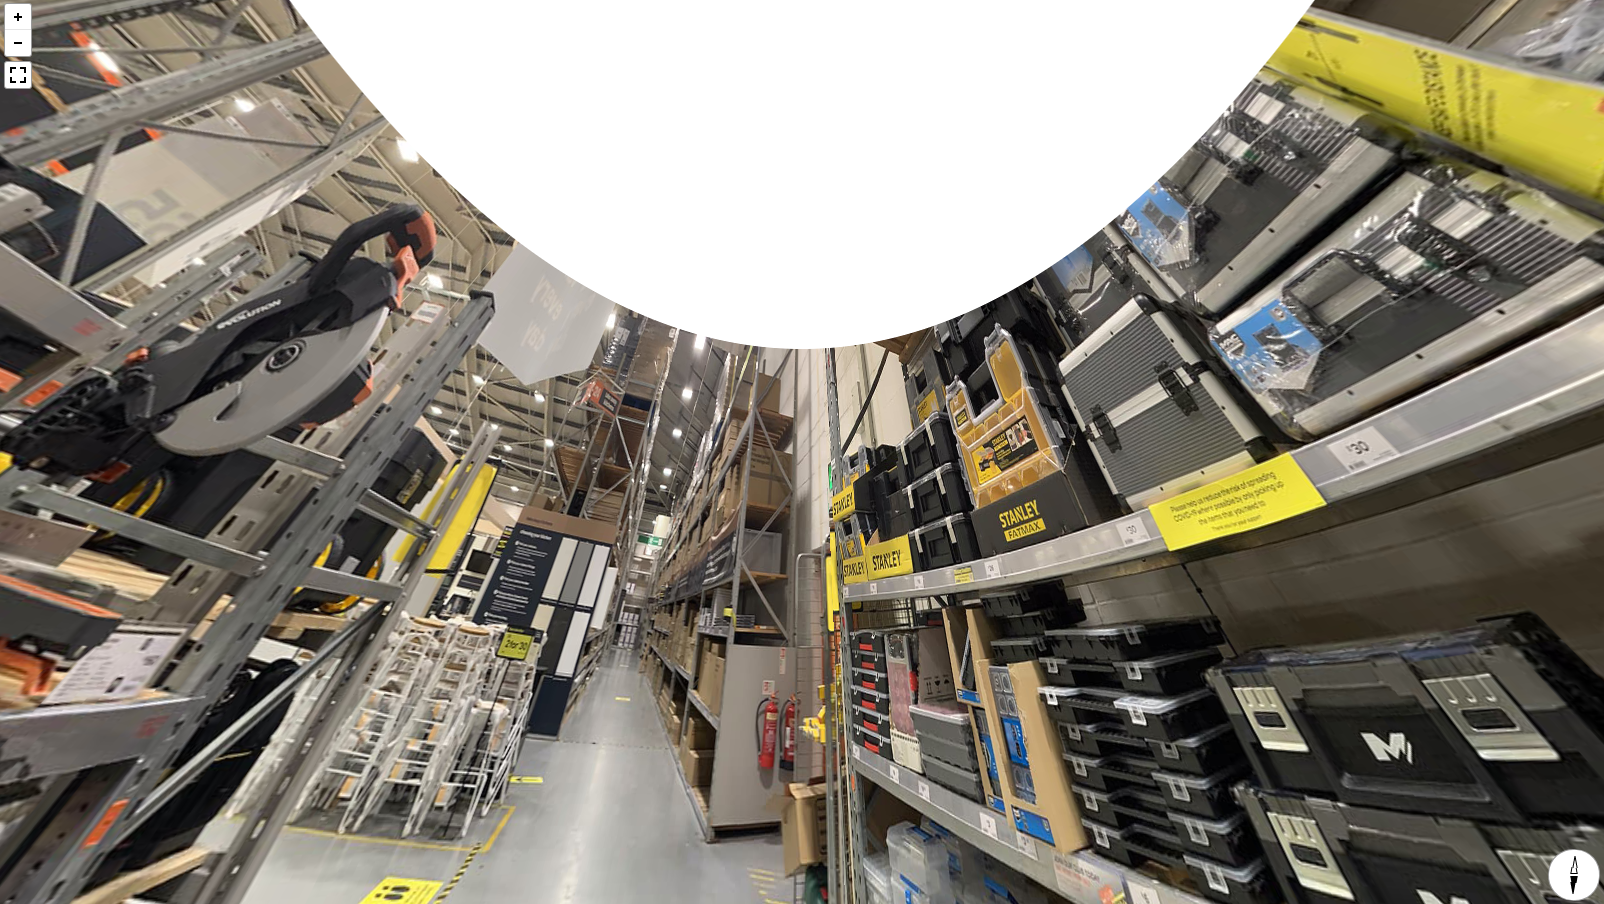
By doing this you will fool the 360° image rendering into rendering the additional 40% of the original image size now added to the top and addional 40% of the original Image size at the bottom as a "360° join" with 360° perspective. When the view looks up to the ceiling or down to their feet then this will give at semi circle of white/black/floor colour space (as you have chosen) but the rest of the image will be rendered in a 360° degree perspective that is very viewable by the user.
An example of this technique used on the same panoramic image (as shown left) in a 360° viewer, within an app, is shown on the right.