Pages - Components (Calendar and Excel Importer)
The Evoke Component "ExcelImporter" allows the user the import data from an Excel spreadsheet into the app and then save this to the datbase.
This can be useful for uploading bulk orders, users, new products, etc.
To configure your Excel Importer on a Page.
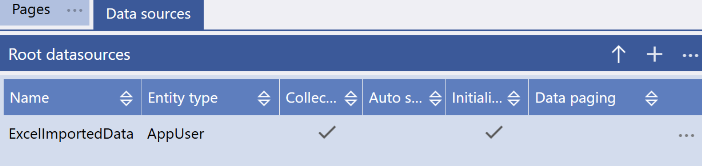
First you will need a datasource configured of the Entity type of the items (records) you wish to import.
You can call the datasource whatever you want but it must be a collection.
In the Content Type section (General tab in Pages) select Component. This will open up a component definition option.
Select
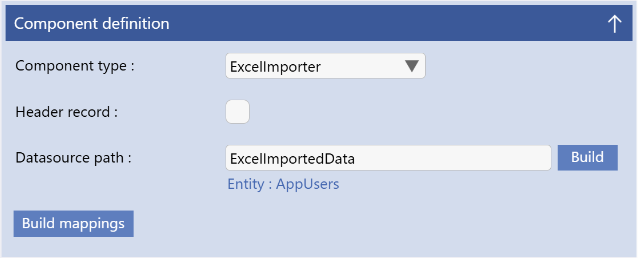
ExcelImporter, from the drop down options, and a new configuration Segment will be displayed, as is shown opposite.
You can now configure your Excel Importer using the following settings:
-
Component Type - This is the component Type of ExcelImporter
-
Header record - a checkbox identifying if the excel file being imported has headers i.e. do the columns have header test in line one instead of data.
-
Datasource Path - This is the datasource that you configured in the step above.
Mapping Excel Columns to Entity Columns.
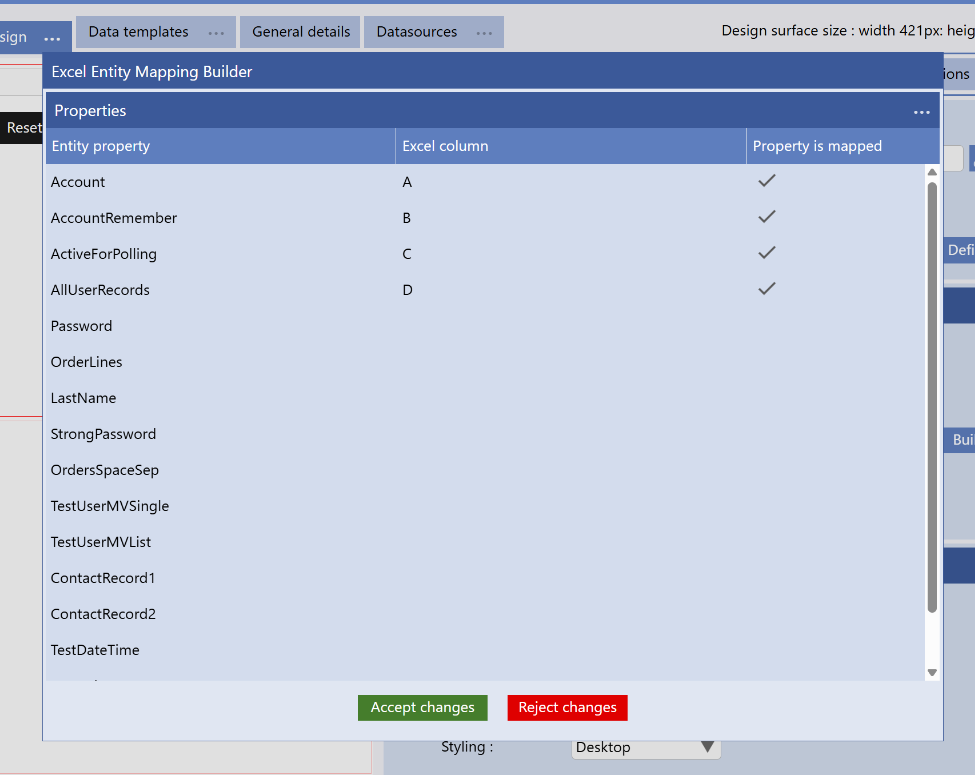
Now you need to map where in your datasource (entity definition) you want the data from each Excel Column to go. To do this click the "Build Mappings" button (see image right).
This will bring up a mappings overlay page (see image right) that shows all the entity columns in the entity that relates to the datasource that you have selected.
If a column in the Excel Spreadsheet contains data that you want imported into a property in your datasource just tick the relevant "property is mapped" checkbox for that property and select the Excel column i.e. Column A, Column B, Column C etc.
Each line of data in your excel spreadsheet will be imported as a seperate datasource item.
Excel Importer Widget Use.
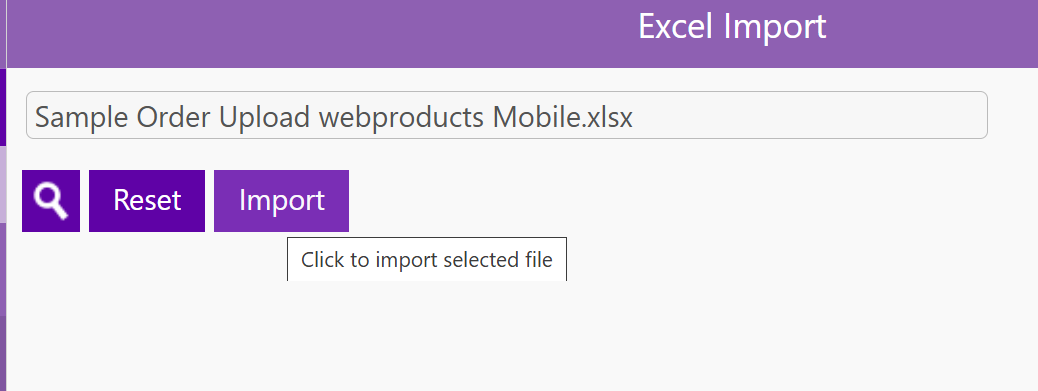
An example of what the Excel Importer looks like in the built app appears top right on this page.
There is a magnifying glass that will bring up the file explorer/file browser of the device that the app is running on to allow for an Excel file to be picked.
The name of the picked file will appear in the Textbox and the "Import" button will import the data into the datasource.
Additional Information: Many of our customers have added "validate" buttons that appear after data is imported, this allows the user to validate that the data imported is of the correct format and appropriate so that the user can correct it before saving it.
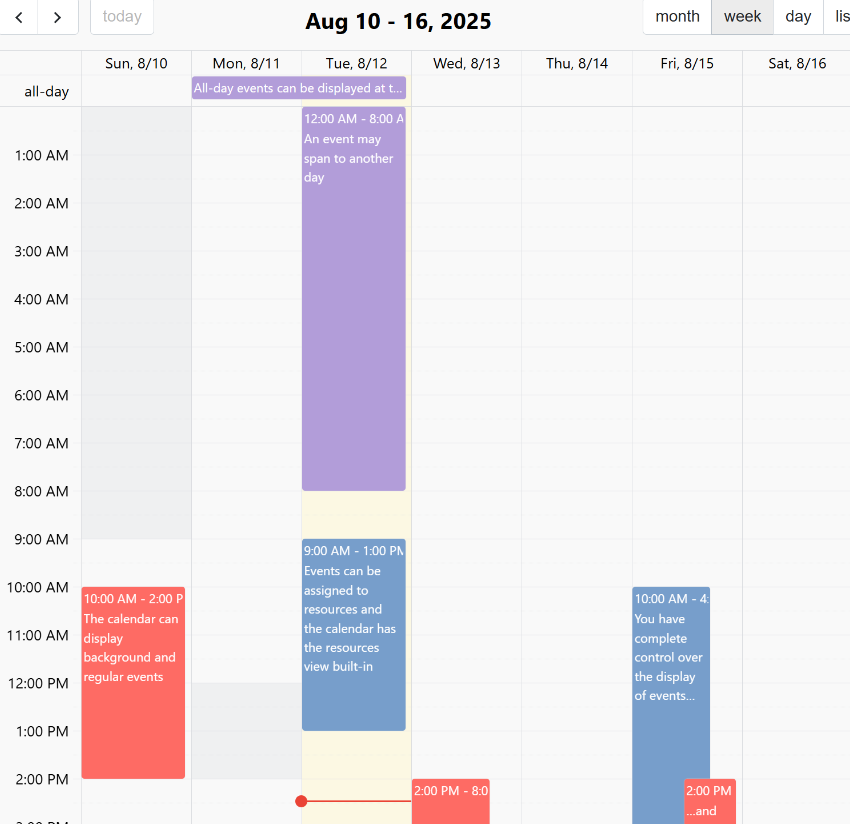
To use the calendar component there is some initial setup that you will need to do. The Calendar requires an Entity, linked to a table/object/file, to hold the Calendar events.
The format of this Entity needs to be:
-
Create a new entity with the name Calendar
-
Add the following properties, with the associated types, and please match the case shown (as these are case sensitive):
-
Property name: allDay, Property Data Type: Boolean, its function is to indicate if an event is time limited or an all day event.
-
Property name: backgroundColor, Property Data Type: AlphaNumeric, its function is to define the background color of the event in the calendar.
-
Property name: backgroundColorSelector, UI Only Property - Property Data Type: Classification (this property is only required if you want to allow users to pick a background color for an event, it is not mandatory)
-
Property name: editable, Property Data Type: Boolean, its function is to indicate if an event is editable by a user after it is created or not.
-
Property name: end, Property Data Type: DateTime, its function is to define the end time of a time limited event.
-
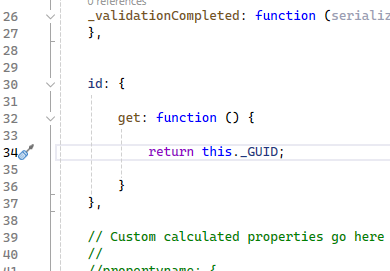
Property name: id, UI Only Property - Property Data Type: AlphaNumeric (this property is a calculated property of type "Custom Code" it is used to provide a unique identifier for your event), please see the custom code that needs to be added below.
-
Property name: start, Property Data Type: DateTime, its function is to define the start time of a time limited event.
-
Property name: textColor, Property Data Type: AlphaNumeric, its function is to define the text color of the event in the calendar.
-
Property name: TextColorSelector, UI Only Property - Property Data Type: Classification (this property is only required if you want to allow users to pick a text color for an event, it is not mandatory), its optional function is to allow a user to pick the text color of the event in the calendar therefore it is suggested to be a classification with some preset colors for the user to pick
-
Property name: title, Property Data Type: AlphaNumeric, its function is to define the name or title of the event.
As detailed above, the property named "id" is a custom code calculated property. This is because some users may want the id to be a concatination of various information or some other unique value.
Therefore, this requires a tiny piece of custom code but it is very easy.
In your Visual Studio solution (and you must have generated your app at least once with the Calendar page series included first) navigate to web/Scripts/Entities/*your pageseries name*.
At the bottom of this file, you will see the comment "// Custom calculated properties go here".
Immediately above this line please add the code shown in the image on the right.
That is, line 30 through 37. id: through to the closing brackets.
You can now configure your Calendar on a Page.
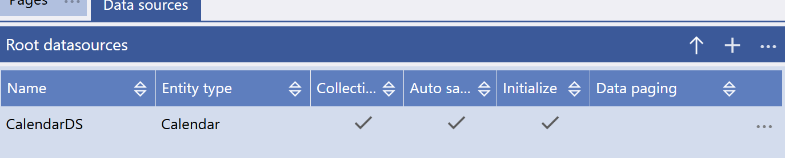
First you will need a datasource structured using the Entity type that you created above.
You can call the datasource whatever you want but it must be a collection and autosavable.
The entity being used must be linked to a table/object/file in your database so that events can be saved and retrieved
In the Content Type section (General tab in Pages) select Component. This will open up a component definition option.
Select
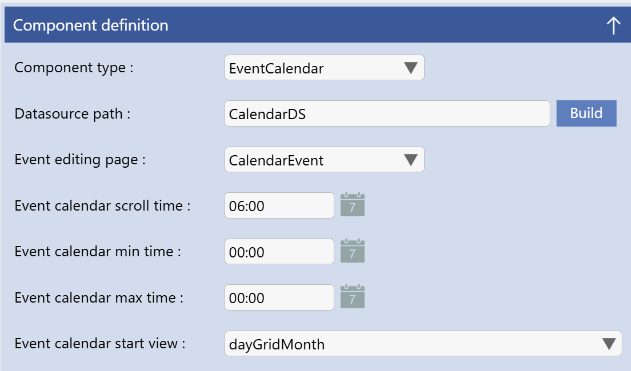
Calendar, from the drop down options, and a new configuration Segment will be displayed, as is shown opposite.
You can now configure your Calendar using the following settings:
-
Component Type - This is the component Type of EventCalendar
-
Datasource Path - This is the datasource that you configured in the step above.
-
Event Editing Page - You need an overlay page (or any page type or segment you choose) for the user to enter the event details. This is fully explained below
-
Event calendar scroll time - Define the time that you want to appear at the top of a scroll when the calendar is displayed
-
Event calendar min time - Use the datepicker to define the earliest time that you want users to be able to add events from during a day.
-
Event calendar max time - Use the datepicker to define the earliest time that you want users to be able to add events from during a day.
-
Event calendar start view - set how you would like the calendar to look when first displayed - month view, week view, day view, list view
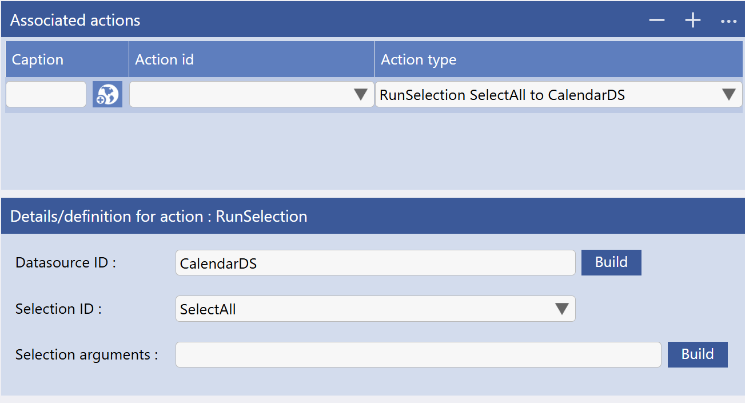
As you will probably want the existing calendar events populated when the user navigates to this page in your app, you will need to go back to the Page Series main page and access "Actions on Load" for this pageSeries.
Add a RunSelection against the Datasource that you have created.
When you start, a "SelectAll" will help you with testing. However, you can select by user, date, or any of the properties you have in or you optionally add to the Entity structure.
Event Editing Page.
When your users click on a day/time in the calendar you need to provide a way for them to enter the event details they want to set up.
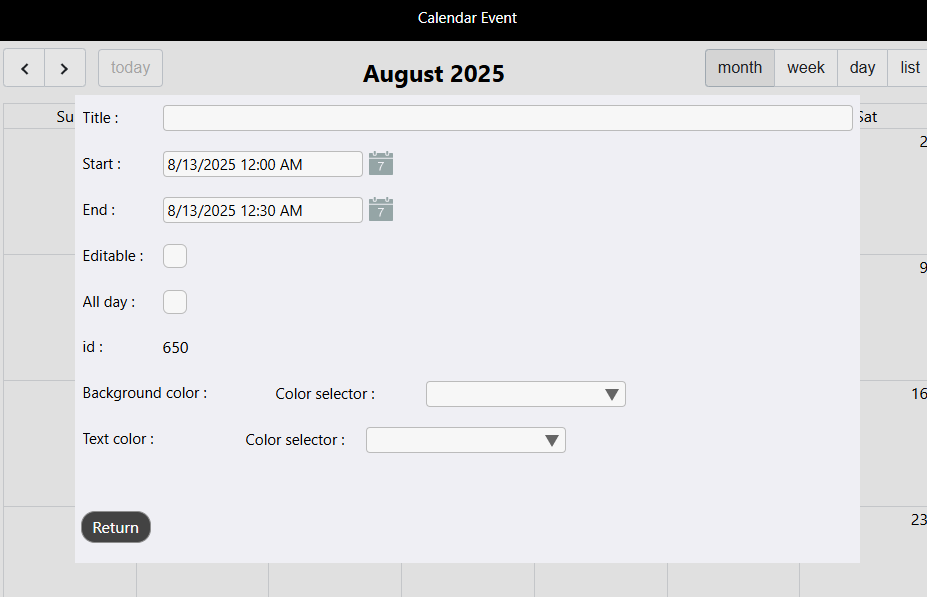
You can do this with another segment on the calendar page, or by navigating to another page. However, we recommend you include an overlay page that pops up in front of the calendar (see image right).
Overlay pages (pop up pages) are defined elsewhere on
this page however, they are just regular pages, with transparent segments around the edges to make them look like a pop up.
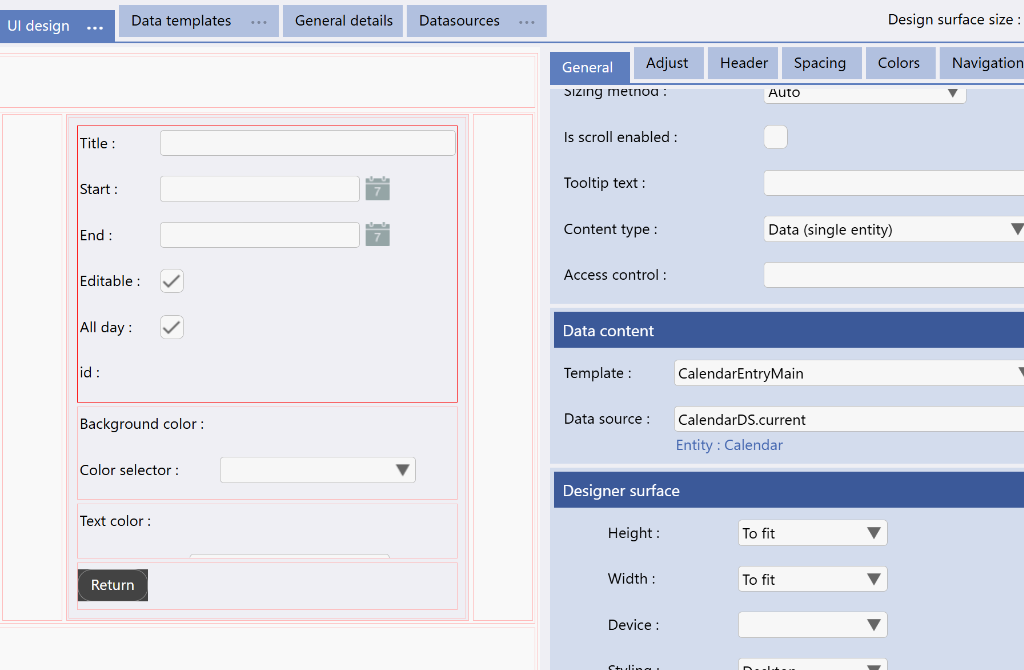
You need to create segments that allow your users to enter or select the data required for an event.
This example shows that we have added a "return" button with an action of "navigate to parent" in order to save the event and get back to the calendar.
Single Entity segments, bound on to the ".current" instance of the Calander Datasource you created above, allow the entry or selection of the different elements of the event entity.
This is all you need to do to allow your users to create events and this page will be automatically navigated to when your user clicks on the calendar to create an event.