

Entities

Each entity is sub-divided into Properties and Entities and Properties may be linked to data/fields in your backend database or used only in the App UI.
Reserved Entities
General
-
Singular Name - Required Field - used in the generation of the App and when custom code is required to be added to the Visual Studio project by the developer. Usually this contains a singular version of the Entity name
-
Collective Name - Required Field - used in the generation of the App and when custom code is required to be added to the Visual Studio project by the developer. Usually this contains a plural version of the Entity name or the Entity name with list on the end of it
-
Description - a free format description of the Entity (recommended but not required)
-
Notes - a free format field for notes and further descriptions of the Entity (not required)
-
UI-Only Usage - Is the Entity mapped to a physical database table/file in the backend database or is it just an Entity that will be used solely in the UI of the App for data presentation or data manipulation?
-
Initialized Remotely - If ticked then when a new instance of the entity is created then a round trip to the middle tier is invoked to populate some initial values into the new instance.
-
Partial offline enabled - Used with native apps. If Partial Offline is enabled in the generator settings then ticking is option will ensure that this entity is included in the entities that can be held offline.

These Properties relate to either the physical fields in your database table/file/object (linked in Data Mappings) or are defined as "UI only" Properties and therefore only used in the app UI and not mapped to a physical database field.
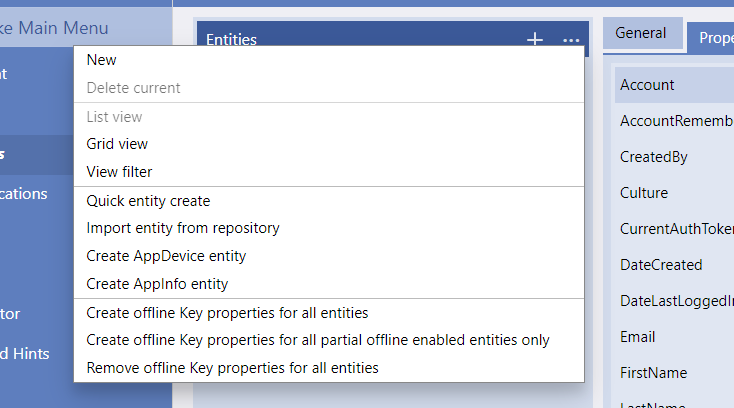
The ellipsis menu on the Properties tab allows you to add and delete properties.
The Properties Tab contains the following information and options regarding each Property:
-
Name - Required Field - contains the chosen name for the Property
-
Description - a free format description of the Property (recommended but not required)
-
Notes - a free format field for notes and further descriptions of the Entity (not required)
-
Data Type - a required field specifying the data type of the property from the following list of drop down options:
-
Cascade Deletes - If the parent record then the child records associated with it are deleted e.g. sub entities.
-
Holds a list of Values - Is the property a list of multiple values/other entities or a single value.
-
Value is calculated - The property is an Evoke Calculated Property
-
UI-Only Usage - Is the property mapped to a physical database table/file field (property) in the backend database or is it just an property that will exist and be used solely in the UI of the App for data presentation or data manipulation?
-
Validated Remotely - If ticked then when the property is amended a round trip to the middle tier is invoked to validate (in custom code) the new value in the property.
-
Is required - when an instance of the entity is saved if this field is ticked then an automatic check is made to ensure the field id populated and an error displayed if it is not.
-
Two further options are available for "AlphaNumeric" Properties: Mask and Mask Type. These provide UI reformating of alphnumeric values and are explained further here.
If you specify a data type of "Entity" for a property then two further property details are displayed and required:
-
Relationship type - Non Required Field - used ito identify that the relationship with the sub entity is a) owner of b) owned by c) is associated with
-
Related Entity - Required Field - select from the drop down list the Entity that you would like included as a related entity to this property

A very common use for this would be a database that has a first name field and a surname field, these would be properties in Evoke (linked to the database fields in data mappings) and then a further "User Interface Only" Property would be defined that is "calculated" as Firstname + Space + Surname
-
Arithmetic Expression - calculates a numeric value based on 2 or more Properties using "sum", "divide", "multiply", calculate the "difference" of all the values in the Properties provided or calculate the value of one property as a "Percentage" based on a percentage value (i.e. 50%) in a second value. Evoke will offer all the possible numeric Properties available e.g. Currency, Integer, Decimal, etc. You can select two values for the divide option; as many of the values as required for the sum or multiplication options; and add a sequence for the "difference" option by either selecting the options in a certain order or changing the sequence number.
-
Boolean Expression - this sets a boolean to true or false based on other properties or static values. For example new boolean property is true is "Sales price" is less than 50 OR boolean property set to true if multiple comments are added in a related property.
-
Casing Conversion - this alters the case of a specified Alpha property value e.g. a name could be set to a) all lower case, b) First Letter Of All Words Is Uppercased or c) All Upper Case.
-
Collection Expression - this allows for a collection (multiple) properties to be a) averaged b) concatenated c) counted to return the number of values d) return the Highest of all the values e) return the lowest of all the values or f) summed. Evoke will ask you to select a source property , this will be a list of Entities (e.g. sales), then you select the related property, for example the sales price, which can be any property designated as a Currency, Integer, Decimal, etc numeric property.
-
Concatenate Properties - this allows multiple values to be concatenated (joined), in any order you specify, with or without a) separators (as for the Full Name giving in the example above) b) changing the the case (as above) and c) being trimmed (removing initial, trailing or intermediate spaces).
-
Conditional Value - this allows the returned value to be based on a conditional test of another property value.
-
Custom Code - this will add software "hooks" to allow you to simply and easily add some specific custom code into your Visual Studio project to calculate the value of the Property and is further explained in Custom Calculated Properties.
-
Related Data Property - allows the value of a related data item property to be represented directly as a property to this Entity.
-
Static Value - allows a static or predefined property value to be specified i.e. setting a boolean to true/false, a date to todays date, an alphanumeric field to a text string, etc
-
String Expression - formats the string based on the expression specified. Allows you to join together several property values. The "Add to String expression" adds the selected property to the string expression being built e.g. {propertyname1}*in*({propertyCountry1}) could result in Paul*in*(USA).
-
Value Conversion

A Date property can be converted to a date, day name, Short day name, Day of week number, full date, full year ISO date or Long date.
You can also use offset to calculate a new date i.e. today plus 30 or 60 or 99 etc or a date field plus 30, 60, 99 etc.
A Time property can be converted to a hours, minutes, seconds, 12 Hour Time, 24 hour time (both with and without seconds), UTC Hours, UTC Minutes, UTC Seconds. An example from the Example app is shown on the right.
A Numeric property value can have zeros converted to blanks and blanks to be converted to zeros.
An Alphanumeric property can be converted with: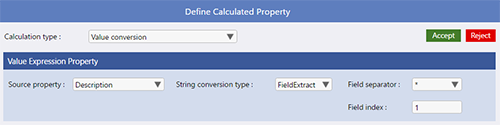
-
Field extract - this allows you to extract the first part of a property, up to a field separator, into one property and the second part of a field into another (the field index is 0 for the first part and 1 for the second, etc). There is an example of this in the image on the right.
-
Key Value - contains/displays the key value of an entity only if a key has been assigned.
-
MultipleLineToSingle - converts a string value holding CRLF characters to a single line display field.
-
SingleLineToMultiple - converts a single line value to multiple lines using CRCF characters to replace a specified separator.
-
SubString - Returns a sub-string based on a start and end index position (the ability to extract characters e.g. 10-16 of a 16 character field or 4-7 of another 18 character field and put them in this calculated property )
-
Trim - allows selective removal of spaces from the source value
-
PrivacyMask - This allows you to replace certain sections of a property value with a specified alternative character in order to hide sensitive data. The replacement of characters can be done in one of 2 ways - either character-by-character or by groups of characters. Both styles allow you to enter a mask string which defines how character replacement is to be performed - this mask takes the form of a series of space separated patterns as described below.
-


Character-by-character replacement
The mask takes the form:
xRc - where:
xL - where:
Example:
Original property value: 1234 5678 9012 3456
Mask: 15R* 4L
Converted value: ***************3456
Group-based replacement
Firstly, the character that separates each group of characters needs to be specified.
Secondly, a mask taking the form:
xRc - where:
c is the replacement character
xL - where:
Example:
Group separator: {space}
Original property value: 1234 5678 9012 3456
Mask: 3R* 1L Converted value: *** *** **** 3456
Note, the group separator has been retained within the converted value.

In the Data Mappings area, for a MultiValue repository, the "Custom" Entity key storage option allows you to indicate that some custom DataBASIC code will handle the reading of data for this entity relationship. If this option is chosen, you are able to enter a comma separated list of attribute numbers indicating which fields of data from the parent item are to be supplied to the custom code in order for the correct entity instance(s) to be retrieved. Within the .CUSTOM CRUD routine, if the routine has been called as part of a related data retrieval attribute #4 of the ControlIn argument will be set the "Custom" and the DataIn argument will be set to a value mark separated list of values corresponding to the list of attribute numbers defined within the data mappings page. If the entity property is a single value, the "Read" CRUD action will be called to retrieve the related data. Alternatively, if it is a list property the "ReadMultiple" CRUD action will be called.
Calculated entity property and Custom Entity key storage
There is a loose relationship between the 2 above features in that if an entity property does not have the complete item ID of the related data supplied by a property value, then it is implied that some custom CRUD must be used to retrieve the related data.
-
Switch between Grid View and List View
-
Create Properties using the Quick Property Create option
-
Import Properties from tables and object in the database
-
Create the Reserved entities "AppDevice" and "AppInfo"
-
Create and manage the "offline key" properties for an Entity

Quick Property Create

Automatically import Entity structures (database table structures) into your App Design
-
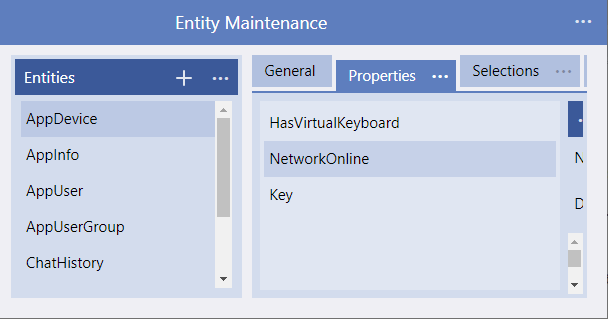
A "HasVirtualKeyboard" boolean indicator
-
A "NetworkOnline" boolean indicator
-
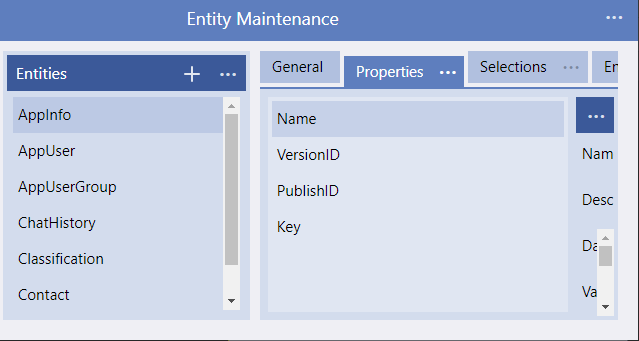
The Version ID (from the main Apps App information page)
-
the Publish ID (from the Visual Studio portion of the Web App screen)

A description of using selections to populate data sources is described here.
Data Validation
Classifications
Entity Browser

As shown in the image on the right, the Evoke entity browser allows you to click on a property and see up to 3 entities and their respective inter-relationships.
In addition to related entities you are also able to see the classifications and and single properties of the entities browsed.
the top of each column shows the entity name and if it is the parent of child to the related entity.
Importing Entities
AlphaNumeric Properties Masking
-
Mask type
A property can be assigned a display/input mask (pick from drop down menu on option) which will be used to format the display of the property's data value. There are 2 options at present: None - No mask will be applied; Display - the supplied mask will be used to format the display of the property's value but this formatting will be temporarily suspended when the user is editing the value. -
Mask
This allows a mask definition to be supplied. A mask definition comprises a series of space-separated character group patterns, each of which describes either a literal string to be inserted into the property value or the definition of what format a series of characters within the property value should be.
For example, to format a phone number of 01234123456 into (01234) 123 456 you would enter a mask definition of ( 5n ) s 3n s 3n - note spaces between formatting are important and MUST be included.
In the above mask, the open and close brackets represent literal data to be inserted before and after the first 5 digits within the phone number; the "5n" means "5 numeric characters". The 2 "s" group patterns indicate that a space needs to be inserted after the close round bracket and after the next group of 3 digits.
The full range of options available in a mask are:-
s = insert a space character
-
z n = insert z numeric characters from the current position within the property value
-
z a = insert z alphabetic characters from the current position within the property value
-
z l = insert z lower cased alphabetic characters from the current position within the property value
-
z u = insert z upper cased alphabetic characters from the current position within the property value
-
z x = insert z characters (any type) from the current position within the property value
any other value is assumed to be a literal string to into the property value at the specified position
-